> For the complete documentation index, see [llms.txt](https://siff.gitbook.io/siff/llms.txt). Markdown versions of documentation pages are available by appending `.md` to page URLs; this page is available as [Markdown](https://siff.gitbook.io/siff/guides/sso-external-authentication/azure-ad-entra-id.md).
# Azure AD / Entra ID
### SIFF Configuration
1. Navigate to Admin > Organizations
2. Edit the organization to use Azure AD
3. Select the *External Auth* tab
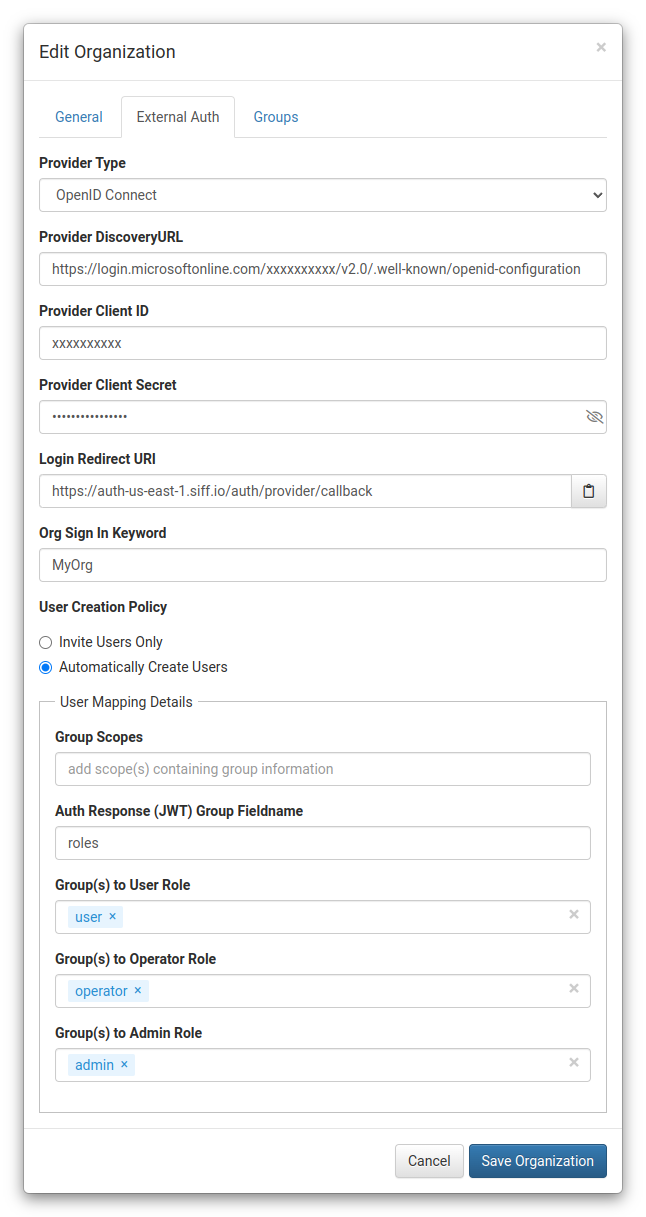
4. Configure the fields as shown below:
1. Provider Type: `OpenID Connect`
2. Provider DiscoveryURL: set to the value from Azure AD > App Registration > Overview > Endpoints - OpenID Connect metadata document (endpoint)
3. Provider Client ID: set to the value from Azure AD > App Registration > Overview - Application (client) ID
4. Provider Client Secret: set to the value from Azure AD > App Registration > Certificates & secrets - secret value (NOT Secret ID)
5. Org Sign In Keyword: use a unique keyword (e.g. your org name) to provide on the SIFF login screen to be redirected to your Azure SSO Login
6. User Creation Policy: *Automatically Create Users*
1. Group Scopes: leave blank
2. Auth Response (JWT) Group Fieldname: `roles`
3. Group(s) to User Role: `user`
4. Group(s) to Operator Role: `operator`
5. Group(s) to Admin Role: `admin`
### Azure AD Configuration
1. Navigate to Azure AD > App Registration
2. Select *New Registration*
1. Name: `SIFF Client`
2. Select the desired account type
3. Under *Resirect URI (optional)*
1. Platform: `web`
2. URL: this should match the *Login Redirect URI* from the SIFF Configuration, for the default region: `https://auth-us-east-1.siff.io/auth/provider/callback`
3. Navigate to Azure AD > App Registration > SIFF Client > Overview. This provides values required for the SIFF Configuration above. Select *Endpoints* to see the URL for the OpenID Connect metadata document.
4. Navigate to Azure AD > App Registration > SIFF Client > Authentication. **Select the tokens** for authorization endpoint - set ID tokens (used for implicit and hybrid flows)
5. Navigate to Azure AD > App Registration > SIFF Client > Certificates & secrets
1. Create New client secret
2. Copy the Secret value and use that value in the SIFF Configuration above.
6. Navigate to Azure AD > App Registration > SIFF Client > API permissions\
(optional) Select “Grant admin consent” to pre-authorize SSO grant.
7. Navigate to Azure AD > App Registration > SIFF Client > App Roles
1. Create three app roles as follows: 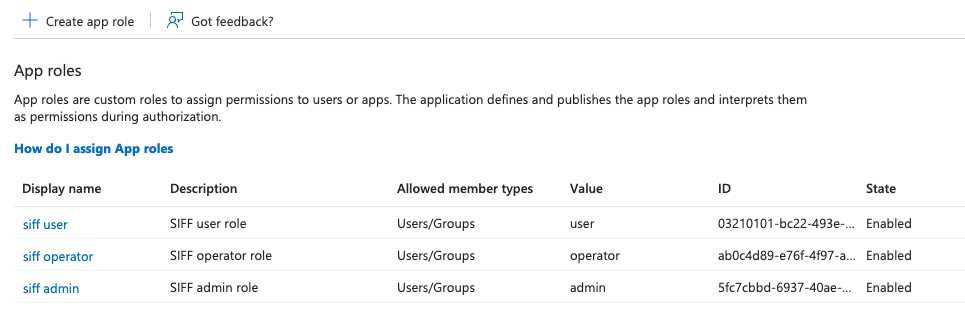
8. Navigate to Azure AD > Enterprise Apps > SIFF Client > Users and Groups
1. Add User / Group to the SIFF Client app
2. Select *Edit Assignment* to assign app roles to users / groups
### SIFF Login
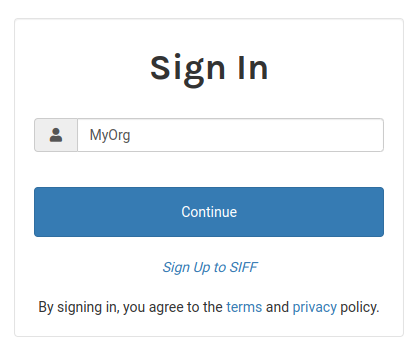
On the SIFF Login page enter the *Org Sign In Keyword* from the SIFF Configuration above. This will redirect you to Azure SSO sign-in and then back to SIFF.